Her Majesty's DBS Restoration Update: Jewelry and Electrical Nightmares
 Gebruder Gumbold
San FranciscoPosts: 549MI6 Agent
Dear AJB Chums,
Thanks to all for the nice words following the last update. Been pulled in several directions on the build, and that is par for the course as I'm juggling between platers, metal gurus, metal polishers, and solving electrical woes, and all the while trying to keep moving forward. Here are a few in progress photos. Hope you enjoy...
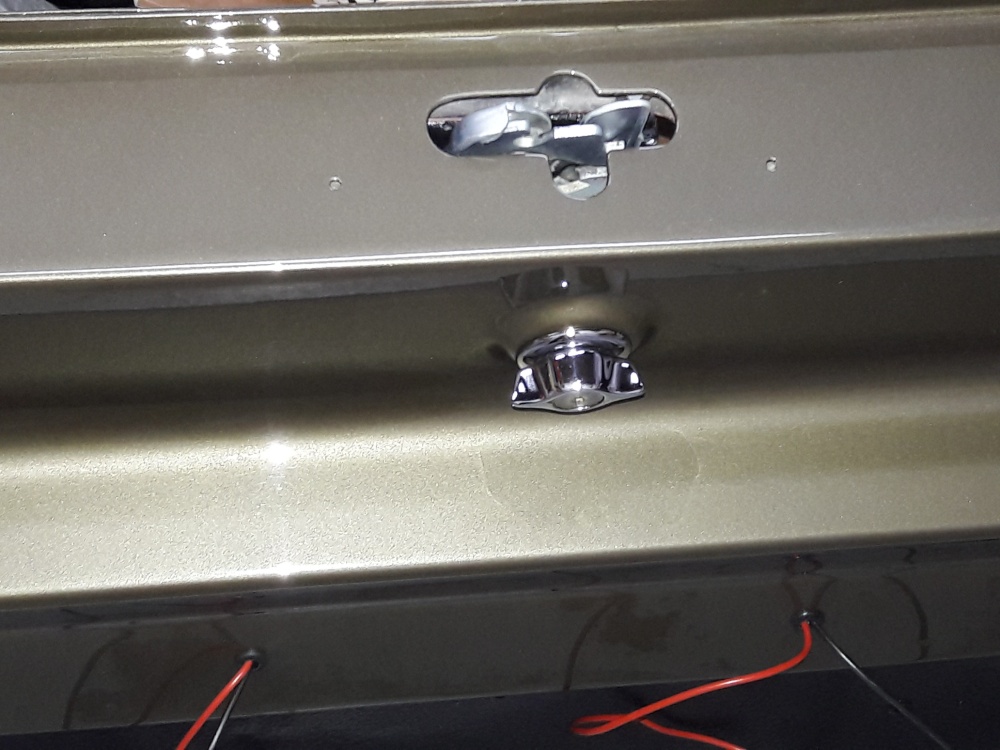
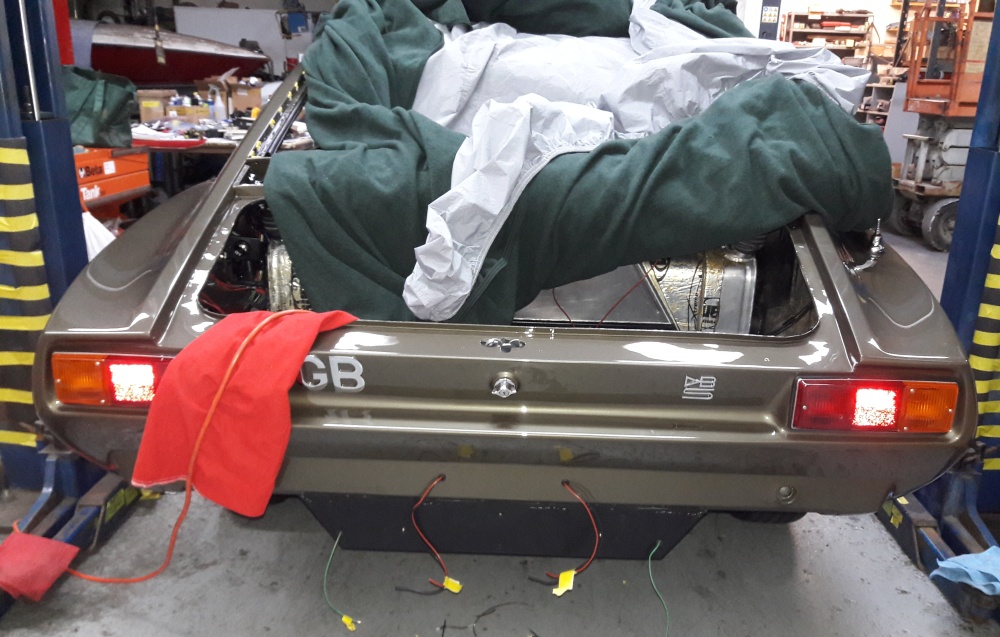
Boot lock goes in...mind the paint! Tape, tape and more tape when fitting body parts near painted areas. Boot lock was plated again, cleaned, greased, and adjusted to open and shut properly. There are stainless trims around the rear boot area- you can just see the screw holes. I await the polisher for these...
Truly jewelry: The "GB" badge that appears in many of the film shots, and the fiddly "DBS" badge that all DBS cars wore, including the DBSV8s. You can see the lovely frosted boot lamp as well as the fuel filler neck hose, which shall all be covered with Wilton wool carpet after test drives, to make sure that there are no leaks. I am considering a Malpassi fuel regulator and auxiliary fuel filter, which is very fine, and given the lousy fuel of today, would be a good precaution. The Weber carburettors like to run on about 3psi, so the regulator will help steady the pressure. I had fitted one on another Vantage engined Aston, and it worked very well. Will hide it somewhere int he boot, as it is not original equipment.
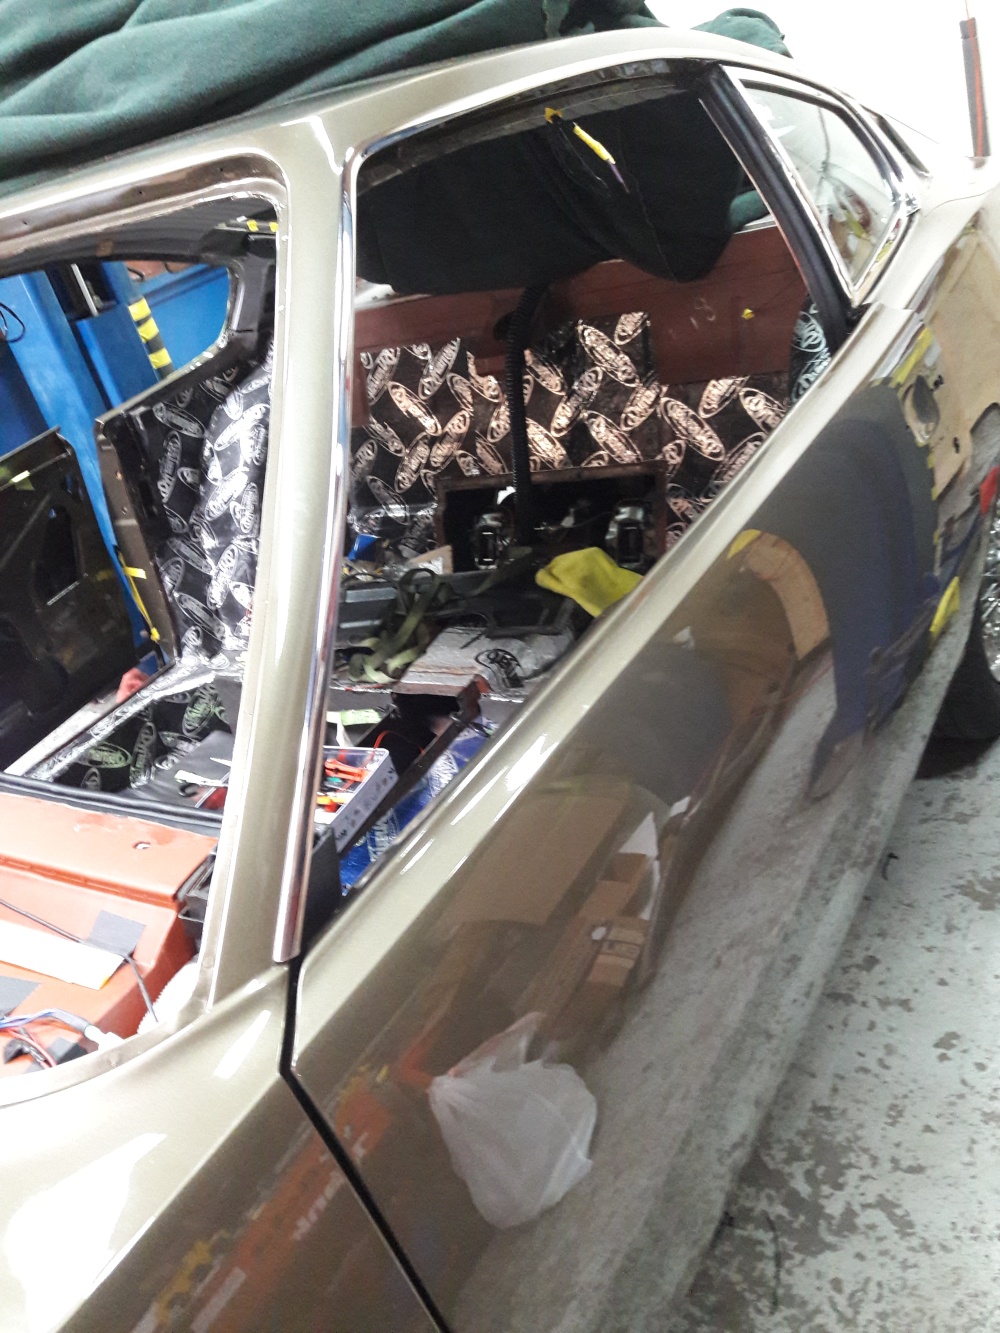
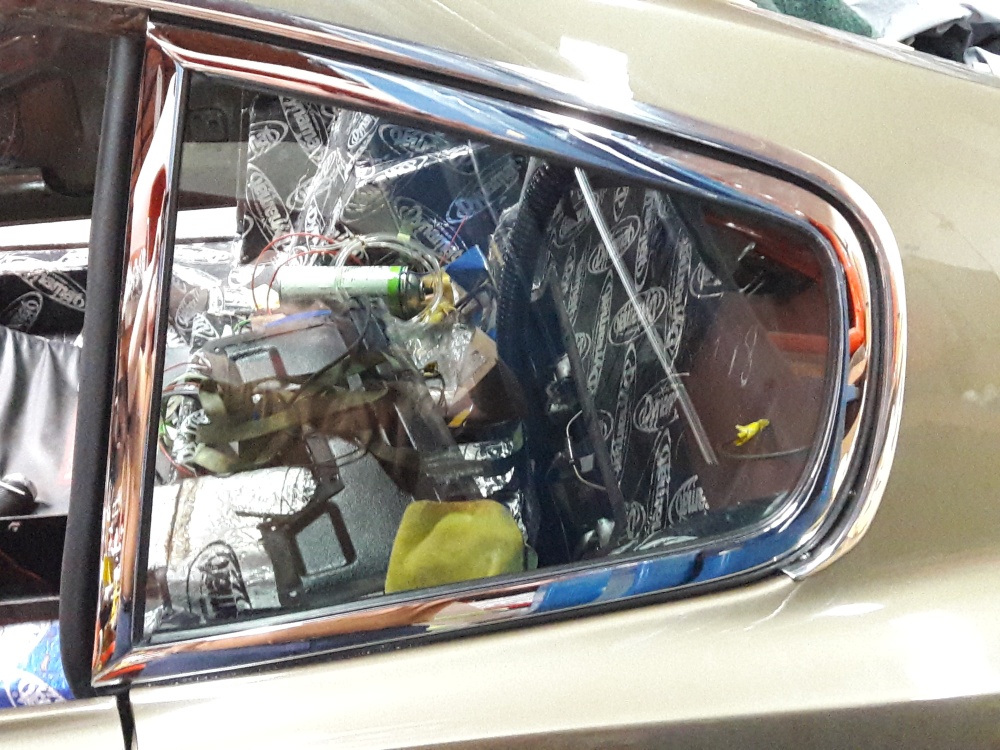
The stainless rain gutter that begins at the base of the windscreen, or "A" pillar, and runs all the way round the back quarter glass is the most expensive and maddening piece of trim that I have ever touched! They are so very thin, and made on a jig then bent, spindled, and mutilated to fit the car! They are long and obnoxiously wavy, and bend so easily. You can't clamp them to anything, so polishing is a nightmare. My set came from a donor car, as you can only weld and polish so many times before you run out of thickness. A special crate had to be built to send these from Australia, and there's no way to remove them without bending, as the factory set them in with a caulking that, after some years hardens like epoxy! My metal guru has about 25 hours into each piece. That's $10K in rain gutters! Some holes had to be welded up and redrilled, or punched with a die, and even after 100 times fitting before paint, the bastards still tried to dig into the Olive! Most uncooperative bit of trim. Nevertheless, two of us managed to fit 1 side, and then I fitted the quarter glass- which is another picnic of trying to push it into place without cracking anything, then fishing for the screw holes, which somehow were filled over during the blocking process. Fortunately, I planned ahead and located them prior to installing the quarter glass. You have to keep the glass angled to the line of the sweep of the C-Pillar!
The Monza type fuel filler- one on either side of the car, so no waiting at the pump!
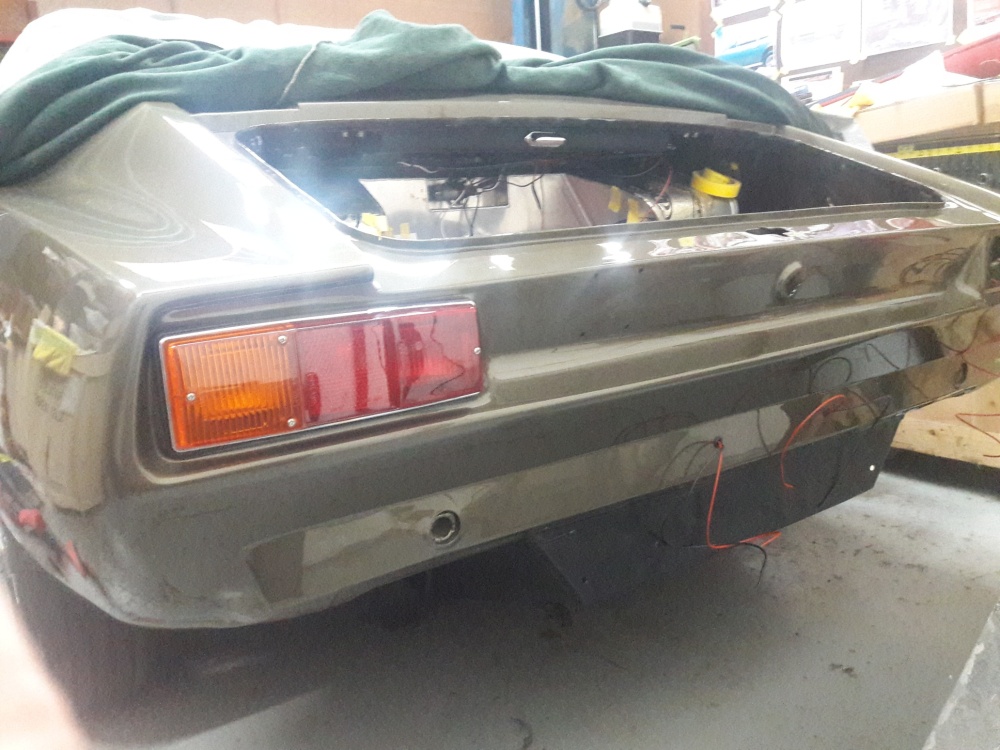
I still say that she has one of the prettiest rear views of any car. Iso Grifo included, which was an imitation of William Towns' design.
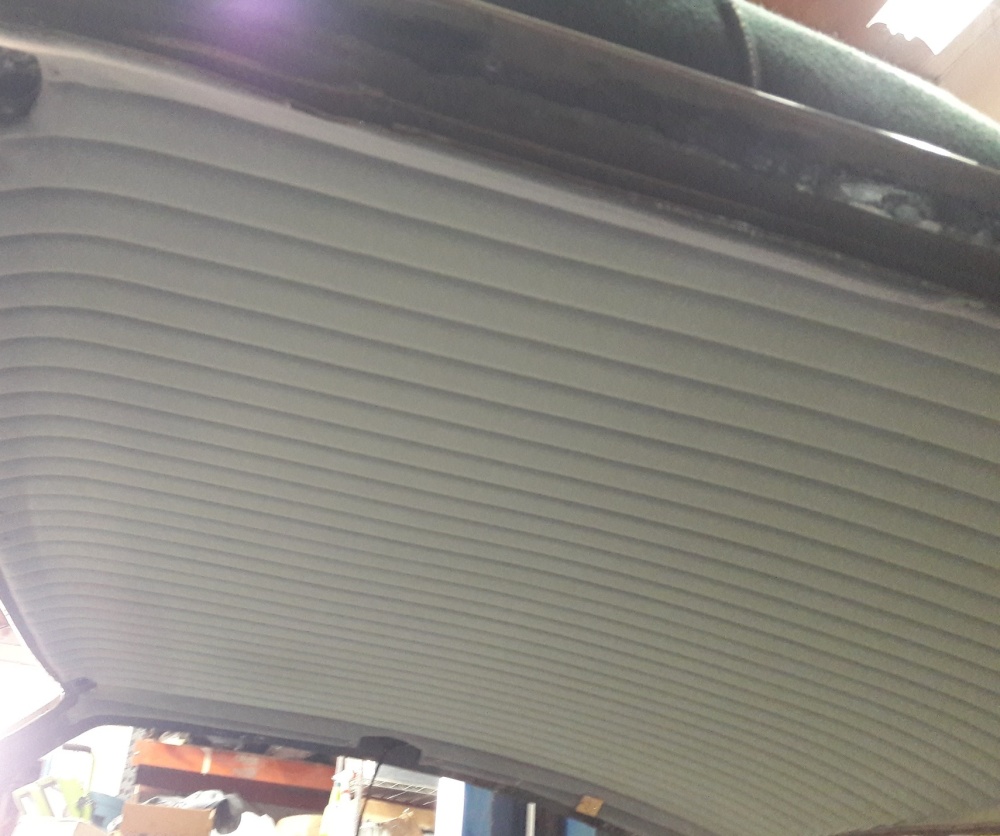
That is the original and extremely fragile dove grey headliner. Glued in around the back window aperture, so it must go in before the back glass does. A huge concours + point getter- not many cars of this era have their original headliner in such pristine condition. Whole piece is mounted to a moulded aluminum sheet, and acts like a kite when you walk it over to the shop from storage on a breezy day!
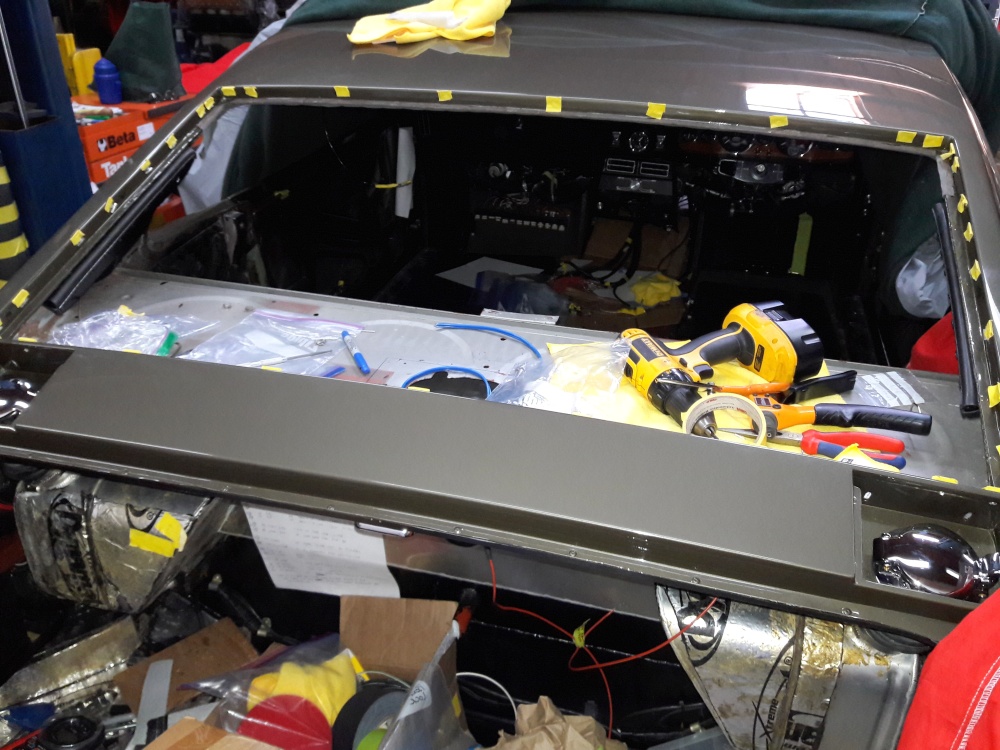
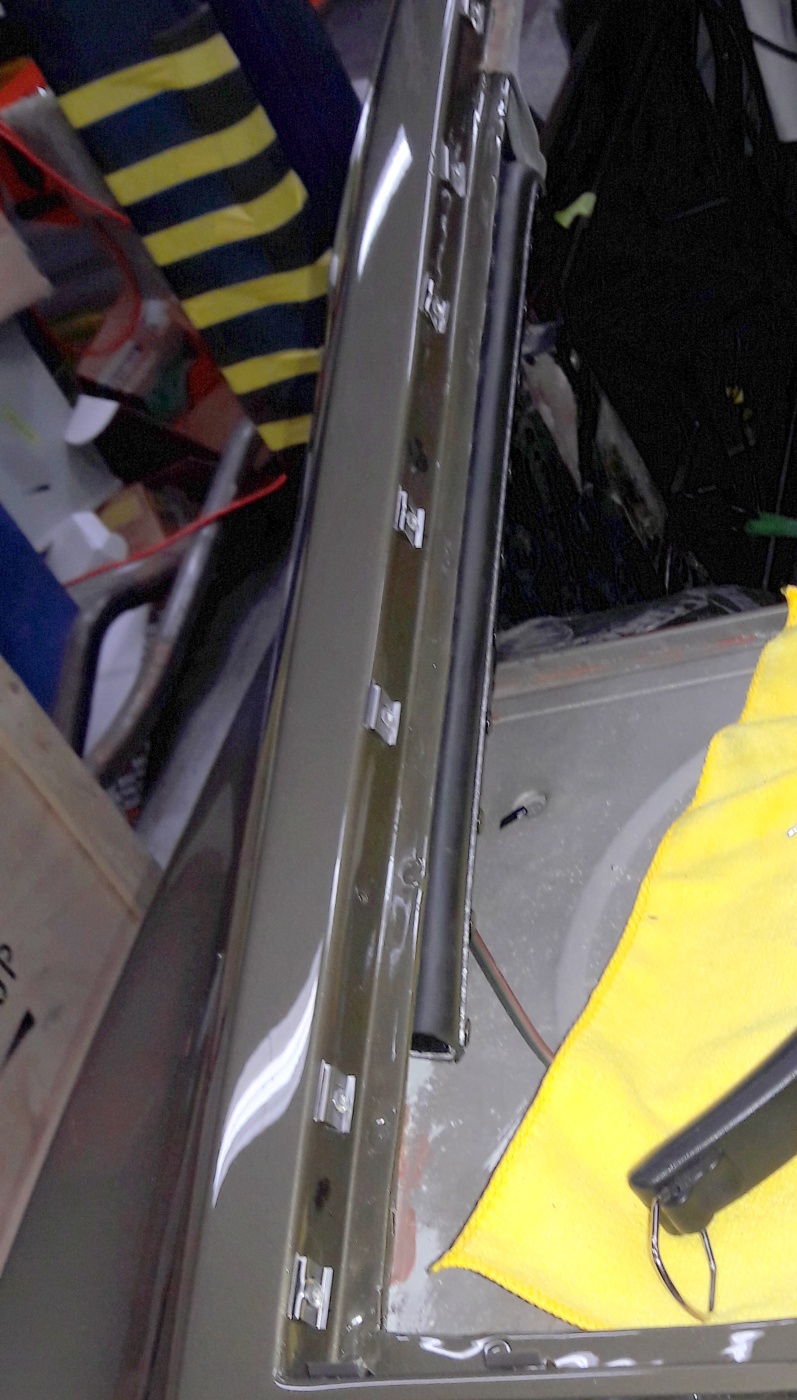
Hard to see what these are, but they are the stainless clips that hold the SS window mouldings. They act like single edged razor blades when wiping the car down. I have scars on my forearms from them! Above photo shows their location, taped in yellow. They are riveted in, and each one has a small,square hole to fit a round rivet, which means that every one of the 32-odd clips has to be hand reamed to fit each rivet! Assembling them onto the car is a real adventure, and you have to take care not to scratch paint.I use a nice hydraulic rivet tool which has little recoil. Each rivet hole has to be carefully fit to the rivet, as you are going through aluminum, then a steel aperture. Very tricky indeed...
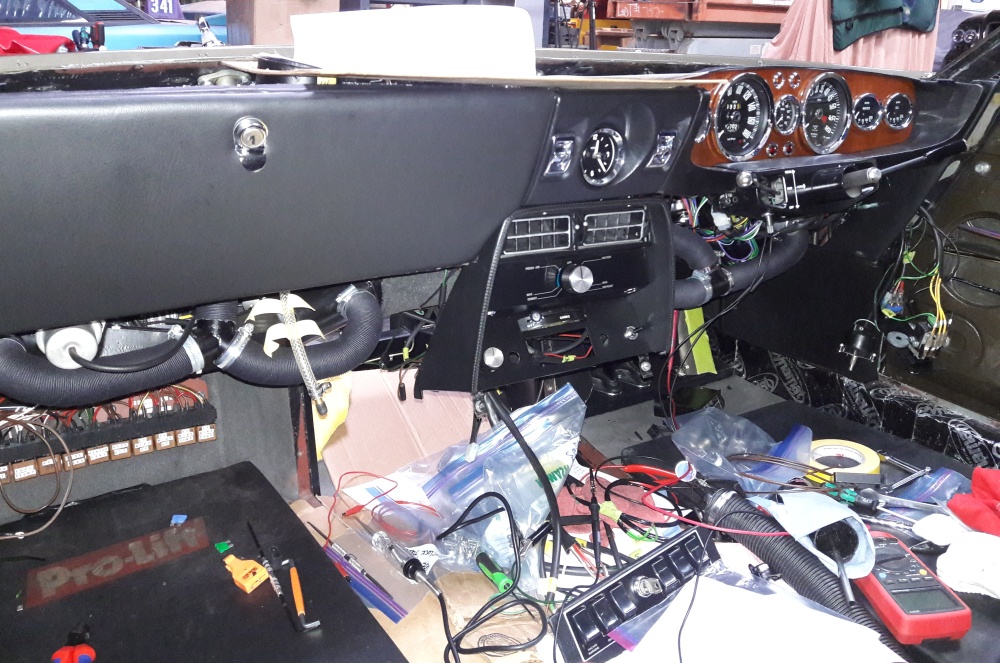
The cleaning lady had the week off... Solving some electrical woes while the assembly of the centre console happens. There is the clock, with power window switches on wither side. Below that, face vents. Below the vents is the incredibly complicated fan and heater control unit, which uses a cam driving various vacuum operated servoes. There are nearly 20 different hoses and valves in the system- a ripe situation for a vacuum leak, and poor running engine. Below all that is the choke control, then the radio plate with the balance control and power antenna on either side. An amber choke warning lamp on the centre of the dash lights up when the choke is one. Imagine the wonderful Lucas switch that fails intermittently! Works brilliantly on the bench, but not in the car. Engineered a stiffer spring on the contact point,and all is well. Same for the fan switch. The interior lamps stayed on, and that was traced to faulty reproduction door switches, which were 1/4" too short. Found some originals and swapped them out, and now they activate when the door is shut. That was 6 hours of tracing and isolating that problem.
...And there you have it: she is officially an Aston, but not just any Aston- a David Brown Aston Martin. The DBS was the last of the Sir David Brown era cars. He sold the company in 1972, and subsequent models were the AM Vantage and AMV8, that is, up until the late 90s when the DB moniker returned with the DB7. I say that the Series 1 DBS is my favourite and to me, the most beautiful and elegant of all the DB era cars. Sure the DB5 is an iconic figure, but looks dated next to William Towns' sleek design. The DB4-DB6 were designed by the Italian company Touring, which went belly up just after producing 2 attractive DBS prototypes, which were based on a DB6 chassis, and are smaller and thinner than the Towns design. Nice to see a pure English body on an English car, which is why the DBS ranks very highly with collectors. When Peter Hunt saw this car at Aston when looking for a new car for the new Bond, he was smitten! So was I at the drive in movie in 1976, on a double bill with Goldfinger. Sure, I had a Corgi DB5, but longed for that gorgeous, elegant Aston that eluded me for 35 years. Definitely worth the wait!
Next: Hydraulic leaks, a perhaps a bumper, horror #2 as the RH rain gutter and quarter glass go in. Have the bandaids ready for the front windscreen moulding clips, and how to find out why the wipers and instruments don't work..yet.
Cheers, Tom






Comments
I love reading your updates and seeing all the accompanying pics, Tom.
You seem to encounter challenge after challenge but overcome them all.
I wonder how those A pillar trims were fitted in the factory? I'm sure they must have had a knack rather than spending hours of toil and trouble and effing and blinding! ;-D
Love that rear end shot. Just looks so cool.
Looking forward to the next update!👍️
My Dear Chap,
Thanks for the kind words and moral support throughout this long journey. Regarding the trims, there's a reason that Aston Martin lost money on every car they made: Time!
You see, that front end sharknose alone took over 200 hours to construct- not counting time to develop the buck, so right there, they were behind the 8 ball in terms of man hours. They could only crank out so many DBS cars per week, etc. One US Ford plant in 1945 was able to cough up a B-29 bomber in 59 seconds. Apples and oranges, but it does put things into production perspective.
I have spoken with the chaps at the Works, and they too struggle with the rain gutters, which is why they were dropped on the AMV8 models. Such a pity, as they set off the side of the car quite nicely. They also ceased the sharknose front panel after production #350 or so on the DBS, claiming that they wanted front end stability at higher speeds. Well, Chief Engineer Dudley Gershon wrote in his book that AM took 2 early DBS cars to LeMans with the new V8 engines in them, and ran to top speed. No instability was found, so in my opinion, I conclude that it was another cost cutting measure. This was 1969.
Next challenge is finding the hydraulic leak! I think that the reservoir pots are leaking where the flare fitting joins in. Another epic disassembly job required. Hope to fix it all this weekend, if the electrics stay put. Going to interview another dyno shop tomorrow and have a look.
Back to work, you've no idea how it's piling up...
Cheers, Tom